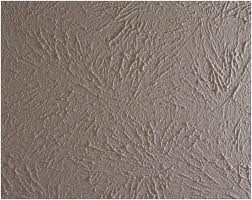
How to Remove Stubborn Stipple Texture
As the best painter Sandy Springs has to offer, GreenWave Solutions gets involved in all kinds of cool and challenging projects. One service that we have had many recent requests for is ceiling smoothing. This includes both popcorn texture and stipple texture.
As a construction professional, I loathe both of these finishing systems because I know builders use them. Textured drywall finishes are used to hide shoddy drywall finishes. Drywall has 6 different levels of finish and here is a brief description of each:
- Level 0: Boards simply hung with no tape or mud.
- Level 1: Drywall and hung and taped, but the tape isn’t covered with joint compound. Boards may have unfinished tool damage.
- Level 2: Boards hung, tape embedded in joint compound and screw holes are mudded.
- Level 3: Boards hung, tape and fastener heads embedded in joint compound, excess joint compound wiped clean.
- Level 4: Same as level 3, with two coats of drywall compound on fastener heads, tapes and other imperfections. Then sand joint compound.
- Level 5: Same as level 4 plus a skim coat of joint compound on all drywall and full sanding.
Here is a great detailed explanation of drywall finishing
For ceilings and walls with a textured finish, such stipple, popcorn, knockdown or orange peel, you stop at level 3. You can stop at level 3 because the texture is applied to cover the incomplete drywall finishing.
Typically, popcorn and stipple texture come off from ceilings quite easily. However, when you run into a stubborn batch of texture, it is going to be a long project. We ran into this on a project just a few weeks ago.
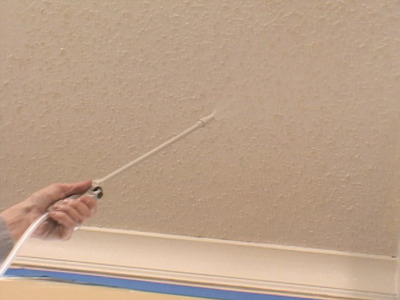
GreenWave Solutions was contracted to do stipple texture removal on a Alpharetta interior painting project. After we finished covering walls and floors, the crew began removing the stipple texture. They did the normal process of applying warm water onto the texture and scraping it off.
It wasn’t coming off without taking the drywall with it.
When I came to the house to check everything out, the first thing that noticed was that the ceilings were badly mangled with paper torn from the gypsum boards. I told my operations manager, “Dude, Luis and the guys are going to have a long with this.”
After finding the guys through the maze of plastic sheeting, I was greeted with “This stuff doesn’t want to come off, man.”
My project manager, Luis, is as good of a PM there is and an excellent problem solver. Had already Googled “how to take down ceiling texture” because this was worse than anything we had encountered in our 8 years working together. He learned that by adding fabric softener to the water, it helps soften the texture compound.
It helped, but not enough. After 2 days of fighting with this texture, Luis had enough and brought in the heavy artillery. He went to Sunbelt and rented a commercial drywall sander with a vacuum attachment. These Porter Cable drywall sanders is what I used to sell to huge drywall outfits to finish hotels and casinos in my days at Sherwin Williams. My clients used these machines during the construction of places like Atlantis in Bahamas, The Wynn in Vegas, The W and Terminus in Atlanta.
We were using this on a 2500 square foot house.
A month ago, I would have told you using a commercial drywall sander for stipple texture removal was overkill. Now, I have a new trick up my sleeve. For less than $100/day, I can outfit my guys with a machine that does 4 hours of work in 20 minutes.
Once we got the ceilings smooth, we painted them and had another happy client.
Although this story has a happy ending, it isn’t all rosy sunshine. There is no easy short cut to removing textures from walls and ceilings. It is hard and labor intensive. You have to have a strong neck to look up at a ceiling and work from a ladder above you head for 5+ days.
If popcorn ceiling texture removal and stipple texture ceiling smoothing doesn’t sound like something fun that you want to do during your free time, call the pros at GreenWave Solutions to do it.
I promise it will be worth money.
Connect with Daniel Macris on Google+
GreenWave Solutions is the best painter Sandy Springs has to offer. GreenWave Solutions offers painting in Alpharetta, Atlanta, Decatur, Sandy Springs, Roswell, Brookhaven, Duluth, Grant Park, Inman Park, Buckhead,Milton, Midtown, and more!
We also offer residential and commercial drywall contracting, wood flooring, and many other home improvement and remodeling services.