Drywall contractors, Painters, Interior Painting, Atlanta, Chamblee, Alpharetta, Roswell, Buckhead, Sandy Springs, Dunwoody

How to Patch Small Holes in Drywall

When you are around professional painters everyday, you become jaded to how difficult painting and drywall repair can be.  These trades require skills and knowledge that can be learned only through experience.

Oftentimes, clients call us to finish projects that they started and realized that painting and drywall repair isn’t as easy as it looks.  I see many things that homeowners attempted that were done extremely poorly.

Today, I’m going to go over one of the most simple processes that I see done incorrectly.

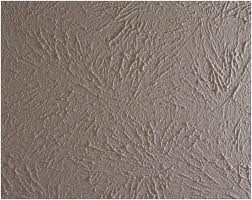
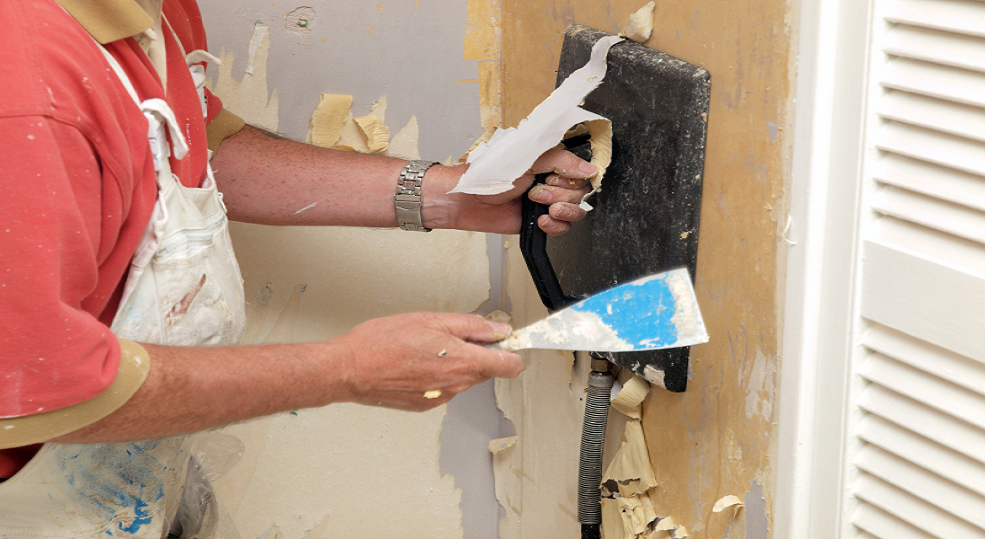
Repairing small holes and minor damage on drywall.

When I saw “small holes”, I mean holes from pictures and other damage that does not go entirely through the drywall.  If you can put you finger or more through the hole and feel the other side of the drywall, then this isn’t the right how to for you.

The most common mistake I see people make when patching minor drywall damage is using too much finishing compound.

I speculate that the following are reasons for this:

  • Impatience
  • Lack of understanding the process.

First off, YOU WANT TO USE ONLY ENOUGH DRYWALL COMPOUND TO FILL THE VOID.

I can’t emphasize this enough.  This about it, any excess compound is going to create a new profile on the drywall.  It may look and feel smooth, but you will quickly see to what I am referring once you paint it.

The mindset is “I need to fill this hole and dammit I’m going to fill this hole.”  Unfortunately, this mindset will cause a bad finish.

The key to flawless drywall repair is using the right tools and understanding of how to apply the drywall compound.

Here are the tools that you need for flawless drywall repair:

  • Drywall finishing knife
  • Mud pan
  • Appropriate type of finishing compound (i.e. 20 min, 45 min, 90 min, or pre-mixed.
  • Sanding Sponge

Here is how to do it:

  1. Cover the associated work area because you are going to make some dust.
  2. Mix your joint compound if applicable
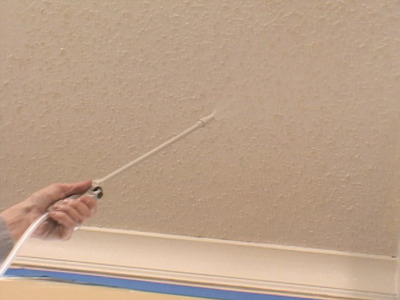
  3. Using your finishing knife, fill the holes with drywall compound.  After the hole appears full, scrape all excess mud off of the wall.  Don’t be scared to use some force.  Remember, the more compound you leave, the more sanding you will do or you will be able to see the repair.
  4. Wait for compound to dry.  A blow dryer can expedite this process.
  5. Sand the repair after the mud dries.  The goal here is remove all compound except where the damage is.  You don’t want to leave any compound on good parts of the wall.
  6. Feel the hole or damage.  If it is smooth, then you are ready to spot prime the repair and paint it.
  7. If you can still see or feel the damage after one coat of drywall repair compound, apply another thin coat as described in steps 3-5.
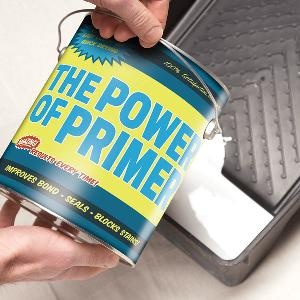
  8. Now that you have a smooth wall, you need to spot prime the repair.  This is necessary because the compound has a different porosity than does paint and applying one coat of paint to compound will cause the repair to “flash.”  If you don’t have primer, most paints can serve as primer for this application.

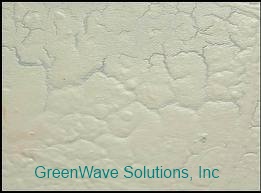
Now that I’ve given away our secrets, I hope that clients will still have a need for GreenWave Solutions’ professional drywall finishing and painting services 😉

Enjoy!

Connect with  on Google+

Painter Atlanta, Painter Sandy Springs, Painter Dunwoody, Painter Brookhaven

How to Remove Stubborn Stipple Texture

As the best painter Sandy Springs has to offer, GreenWave Solutions gets involved in all kinds of cool and challenging projects.  One service that we have had many recent requests for is ceiling smoothing.  This includes both popcorn texture and stipple texture.

As a construction professional, I loathe both of these finishing systems because I know builders use them.  Textured drywall finishes are used to hide shoddy drywall finishes.  Drywall has 6 different levels of finish and here is a brief description of each:

  • Level 0:  Boards simply hung with no tape or mud.
  • Level 1:  Drywall and hung and taped, but the tape isn’t covered with joint compound.  Boards may have unfinished tool damage.
  • Level 2:  Boards hung, tape embedded in joint compound and screw holes are mudded.
  • Level 3:  Boards hung, tape and fastener heads embedded in joint compound, excess joint compound wiped clean.
  • Level 4:  Same as level 3, with two coats of drywall compound on fastener heads, tapes and other imperfections.  Then sand joint compound.
  • Level 5:  Same as level 4 plus a skim coat of joint compound on all drywall and full sanding.

Here is a great detailed explanation of drywall finishing


For ceilings and walls with a textured finish, such stipple, popcorn, knockdown or orange peel, you stop at level 3.  You can stop at level 3 because the texture is applied to cover the incomplete drywall finishing.

Typically, popcorn and stipple texture come off from ceilings quite easily.  However, when you run into a stubborn batch of texture, it is going to be a long project.  We ran into this on a project just a few weeks ago.

GreenWave Solutions was contracted to do stipple texture removal on a Alpharetta interior painting project.  After we finished covering walls and floors, the crew began removing the stipple texture.  They did the normal process of applying warm water onto the texture and scraping it off.

It wasn’t coming off without taking the drywall with it.

When I came to the house to check everything out, the first thing that noticed was that the ceilings were badly mangled with paper torn from the gypsum boards.  I told my operations manager, “Dude, Luis and the guys are going to have a long with this.”

After finding the guys through the maze of plastic sheeting, I was greeted with “This stuff doesn’t want to come off, man.”

My project manager, Luis, is as good of a PM there is and an excellent problem solver.  Had already Googled “how to take down ceiling texture” because this was worse than anything we had encountered in our 8 years working together.  He learned that by adding fabric softener to the water, it helps soften the texture compound.

It helped, but not enough.  After 2 days of fighting with this texture, Luis had enough and brought in the heavy artillery.  He went to Sunbelt and rented a commercial drywall sander with a vacuum attachment.  These Porter Cable drywall sanders is what I used to sell to huge drywall outfits to finish hotels and casinos in my days at Sherwin Williams.  My clients used these machines during the construction of places like Atlantis in Bahamas, The Wynn in Vegas, The W and Terminus in Atlanta.

We were using this on a 2500 square foot house.

A month ago, I would have told you using a commercial drywall sander for stipple texture removal was overkill.  Now, I have a new trick up my sleeve.  For less than $100/day, I can outfit my guys with a machine that does 4 hours of work in 20 minutes.

Once we got the ceilings smooth, we painted them and had another happy client.

Although this story has a happy ending, it isn’t all rosy sunshine.  There is no easy short cut to removing textures from walls and ceilings.  It is hard and labor intensive.  You have to have a strong neck to look up at a ceiling and work from a ladder above you head for 5+ days.

If popcorn ceiling texture removal and stipple texture ceiling smoothing doesn’t sound like something fun that you want to do during your free time, call the pros at GreenWave Solutions to do it.

I promise it will be worth money.

Connect with  on Google+

GreenWave Solutions is the best painter Sandy Springs has to offer.  GreenWave Solutions offers painting in Alpharetta, Atlanta, Decatur, Sandy Springs, Roswell, Brookhaven, Duluth, Grant Park, Inman Park, Buckhead,Milton, Midtown, and more!

We also offer residential and commercial drywall contracting, wood flooring, and many other home improvement and remodeling services.

Painter Sandy Springs Exterior House

How to Make Cedar Shake Look New Again

Anyone who has stained cedar on their home knows exactly what I’m talking about; those nasty black or gray stains that “magically” appear all over the place.  If you are a do it yourselfer or asked an uninformed contractor, you may have heard this was mold, mildew, or dirt.  Then the next rational step is to clean these stain with bleach or trisodium phosphate (TSP). That won’t work.  All that you are going to do is hurt the cedar by hitting it too hard with a pressure washer.  So, does this mean that you are sentenced to living with black stains on your once beautiful cedar shake?

Nope.

These stains are not mold, mildew, or dirt.  They are tannin stain.  Cedar is a very resinous and tannic wood.  That is why it smells so nice and repels insects.  Tannin stains are not destructive or damaging to the wood; they are just ugly.  But ugly is nearly just as bad as destructive when it affects where you live.

How do you remove these ugly tannin stains so that you can restain your cedar to restore its natural beauty?

Oxalic Acid.  Our painters in Sandy Springs use Sherwin Williams’ DeckScapes Revive.  While this product is easy to use, it must done correctly to avoid damaging the wood or causing problems with the staining process.  Here’s how to do it:

  1. Apply the DeckScapes Revive directly to the stained areas of the wood.  Do not thin it or cut it.  You can apply it with a pump sprayer, brush or roller.  Only apply it to an area that you can manage.
  2. After applying the Revive.  What 10-15 minutes.  DO NOT LET IT DRY!  I don’t know what happens because I’ve never let it dry, but the manufacturer is adamant about it.
  3. Pressure wash the wood as you normally wood.
  4. Let the cedar dry for 24 hours before applying your stain.  The picture above was stained using DeckScapes Alkyd Cedar Toner.

The results will be nothing short of amazing.  The black stains will be gone and the cedar will be wood color again.  After you let everything dry for 24 hours, you can stain your cedar.  I like using oil-based toners for this application.  Sherwin Williams and TWP make my favorite toners.

If your home has stained cedar shake and you want it to look new again, call GreenWave Solutions to get an estimate.

404-549-7776


GreenWave Solutions is the best painter Sandy Springs has to offer.  GreenWave Solutions offers painting in Alpharetta, Atlanta, Decatur, Sandy Springs, Roswell, Brookhaven, Duluth, Grant Park, Inman Park, Buckhead,Milton, Midtown, and more!

We also offer residential and commercial drywall contracting, wood flooring, and many other home improvement and remodeling services.

Connect with  on Google+


Painter Sandy Springs Exterior House

This cedar shake was nearly black when we started. This is the result after cleaning it with Revive and staining it with DeckScapes Toner.

Interior & Exterior Painting Services Atlanta, Alpharetta, Dunwoody, Chamblee, Roswell, Buckhead, Sandy Springs

How To Paint a Bath

Bathrooms are some of the more fun places to paint.  They are small and you can usually get creative with colors because of this.  However, the one factor that you must account for when painting your bathroom is water.

Bathrooms are exposed to lots of water, steam, and traffic.  For this, you must take care when selecting bathroom paint.  Since GreenWave Solutions has the best Atlanta painters, we use the best paint.  Our professional choice is Sherwin-Williams’ Duration Home Matte Finish.  This product is washable, scrubable, and water and mildew resistant.  The resins in Duration are very resistant to peeling when exposed to shower steam or water splashing from the sinks.  After you have selected your paint and color, here is what you need to paint your bathroom like our Atlanta Painting pros:

–          Brushes and rollers

–          Roller trays

–          Drop cloths

–          Drywall repair product and knife

–          Tape

–          Tools to remove the back of the toilet

–          Alkyd based aerosol primer (maybe)

–          Caulk (maybe)

Here we go:

1)      Repair any drywall damage (gouges, scratches, etc) and caulk everything (if necessary).

2)      After drywall compound has dried, sand repairs smooth and prime with oil primer.  During this step, prime and water stains that are around using the same primer.

3)      Remove switch plates and outlet covers, tape around towel racks, light fixtures, ceilings and anything else you don’t want to get paint on (unless you are good enough to cut a line without tape).

4)      Start painting.  I like to do the trim first (see #5) and then the walls.  Use your brush to cut and roll the big areas.  If you want to, you can remove the back of the toilet so that you can paint the whole area.  However, using a brush, you can paint behind it enough so that it looks completely painted.  I don’t like removing the back of the commode because it sucks and isn’t really necessary.

5)      Atlanta painting pro tip:  If you are not using tape, paint the trim first.  This way, it doesn’t matter if you get paint on the wall because it is easier to cut a straight line on the wall than on the trim.

6)      Let the paint dry for 30 minutes or so, remove the tape, and do a walkthrough.  Walkthrough refers to checking for missed spots, holidays, etc.

7)      Clean up and get some beer to reward yourself!

This Roswell painting How-to is brought to you by GreenWave Solutions.

By 

President of GreenWave Solutions, the best Atlanta painter and Dunwoody house painters.  GreenWave Solutions offers painter services in Alpharetta, Atlanta, Decatur, Sandy Springs, Roswell, Brookhaven, Duluth, Grant Park, Inman Park, Buckhead,Milton, Midtown, and more!

Interior and Exterior Painter in Dunwoody. Professional Painting Company.

What is Mud Cracking

Have you ever done painting or drywall repair work and everything looked good when you were done, but upon returning the next day you were greeted with cracks (like in the picture above)?

This is called mud cracking.  It gets this name because it so closely resembles the cracking mud in a desert or dry river bed.  Ironically, the scientific cause is the same for both occurrences.

The cause for mud cracking is applying to thick a coat of paint, drywall mud, etc.  When you apply a coating at a milage rate that is thicker than for what it was designed, it causes problems as it dries.  Drying is the simple process of moisture leaving the coating.  When a coat is too thick, the outside layer that is exposed to air begins to harden as moisture is still trying to escape from the inside.  The escaping moisture causes the outside layer to expand and crack.  When the moisture get out, this outside layer contracts back to its original size, but the cracking can’t be undone.

Mud cracking is more prevalent in coatings that dry hard with little flexibility like drywall mud and enamels.

How do you avoid mud cracking?

Preventing mud cracking is the easiest strategy.  Be patient.  If the paint isn’t changing the wall color with one “normal” coat, then you are going to have to do another coat.  Trying to pile it on the wall so heavy isn’t going to magically help the paint’s hide.  It will only leave a sloppy, uneven, finish with a high probability for mud cracking.  The same goes for trying to use drywall mud to fix large, deep holes.

I know that us men don’t like reading instructions, but being a real man includes knowing when you don’t know stuff.  It’s like the old cliche` of asking for directions.  I’d rather stop, ask for help, save my time, gas, and stress instead of proving that I’m a “real man” by driving around like a moron for hours.  Also guys, I don’t care if you painted when you were in college 30 years ago.  Just like computers, phones, and cars, technology has also changed paint products.  Read the directions!

How do you fix mud cracking?

Okay.  So someone didn’t follow directions and the mud cracking has already happened.  Here’s how you fix it.

Sand it smooth and touch up where necessary.  This can be more difficult than it sounds.  Drywall mud is pretty easy because it is made to be sanded, however, if you are using an industrial enamel that is designed to be hard as metal, get your power sander ready.  Also, wear safety glasses and dust masks when you sand this stuff.  Breathing all of that crap is bad for you.

I hope that this has answered any questions you have about mud cracking.  Feel free to email us if you need any help.

By 

President of GreenWave Solutions, Atlanta painting company and Dunwoody house painters.  GreenWave Solutions offers painter services in Alpharetta, Atlanta, Decatur, Sandy Springs, Roswell, Brookhaven, Duluth, Grant Park, Inman Park, Buckhead,Milton, Midtown, and more!

Interior and exterior painting tools used by professional painters, Atlanta Painting Company, House Painters, Atlanta, Alpharetta, Sandy Springs, Dunwoody, Brookhaven, Buckhead, Roswell, Marietta, Milton, Decatur

How to Choose a Roller

I was helping my cousin do some interior painting this weekend and realized how little the average person knows about proper painting techniques.  Oftentimes I struggle to think of topics about which to write because I can’t think of anything that people don’t know.  I guess I have been over thinking it.  I’m going back to the basics for my readers.

How to choose a roller

When choosing a roller, there are three factors that you must define:  nap composition, roller quality, and nap length.

Nap Composition

Nap refers to the fur on the roller.  Composition refers to what the nap is made of.  When choosing what type of roller to use, you need to know what kind of coating you are using.  Alkyds, acrylics, polyurethanes, and lacquers all require a different roller nap.  You use specific rollers for some coatings because the stronger chemicals can cause the nap to melt.  Also, using a roller designed for the coating causes the paint to load and release better, which yields a better finished product.

Manufacturers label the packaging to specify for which coatings are compatible with the roller.  A sure fire way to choose the correct roller composition is to choose your paint first and then choose a roller that works with it.

Roller Quality

Not all rollers are created equal.  Like with most things, the adage “you get what you pay for” applies to rollers.  The difference between cheap and expensive rollers boils down to two characteristics.  Cheap rollers tend to lose more hair while painting.  These hairs end up on whatever you are painting and dry in film.  This is ugly and unprofessional.  In addition to this, the nap on cheap rollers typically doesn’t offer good release which renders a less smooth finish.  The only time I recommend using the cheapest roller available is when you are painting something where quality is not a factor – like a dog house.

Professional painters Trick of the Trade:  Before using any roller, put the roller on the frame and wrap it with painter tape.  Remove the tape before you start painting.  This pulls out the loose hairs and prevents them from ending up on your substrate.

Nap Length

Nap length is the last factor you must determine when choosing a roller.  Nap length is measured in inches and range from foam, mohair, 1/4″, 3/8″, 1/2″, 3/4″, 1″ and more more.  What determines the length of the roller nap is how rough of a substrate you are painting.  If you are painting something super smooth like glass, then you should use a foam roller.  If you are painting something very rough like stucco, use the longer 1″ nap.  By using the right size nap, you ensure that you apply an adequate film of paint and get the smoothest possible finish.

I hope that this answers any questions about how to choose a roller.

By

President of GreenWave Solutions, Atlanta painting company and house painters.  GreenWave Solutions offers the best painter services in Alpharetta, Atlanta, Dunwoody, Decatur, Sandy Springs, Roswell, Brookhaven, Duluth, Grant Park, Inman Park, Buckhead,Milton, Midtown, and more!

GreenWave Solutions is the best painting contractor in Atlanta.

CMU wall with Efflorescence.

What is Efflorescence

Efflorescence.  What a weird word.

Efflorescence – ef-flo-res-cence (ef∋ le res∋ens), 1. a change on the surface to a powdery substance upon exposure to air, as a crystalline substance through loss of water. 2. to become encrusted or covered with crystals of salt or the like through evaporation or chemical change.

In English, efflorescence is that white, powdery stuff that you see on masonry walls.  Because this isn’t a chemistry class, we are going to focus on prevention and remediation, instead of causation.

Although efflorescence is ugly and sounds scary, prevention and removal are simple and inexpensive.

How to prevent efflorescence

This is very easy.  Make sure that the masonry substrate is  at least 14 days old.  If it seems uncured or “hot”, wait another week.  Then, prime it using a masonry primers.  Sherwin Williams makes a great product called Loxon Primer.

Once you have primed, simply apply an appropriate top coat and you are done.  If you followed all of the manufacturer’s instruction, you should not have any problems with efflorescence.

How to remove efflorescence.

This is more difficult than prevention, but it isn’t a huge problem.  First off, efflorescence is a cosmetic problem.  It does not degrade the monolithic strength of the substrate.  The efflorescence on the wall pictured above is ugly, but it won’t hurt the wall.  So if you have efflorescence and it doesn’t bother you, leave it alone.  If its unsightliness does bother you, here is how you fix it.

  1. Clean the efflorescence with muriatic acid.  Be careful; hydrochloric acid is nasty stuff.  You may need to dilute depending on the molar strength.
  2. Scrape the efflorescence.
  3. Make sure you have rinsed all of the muriatic acid and allow everything to dry thoroughly.
  4. Prime and repaint using the system described above in the “prevention” section.

I hope that you were entertained while reading this riveting expose` on efflorescence.

GreenWave is also the best interior house painters, exterior house painters, and house painting company and serves Atlanta, Alpharetta, Brookhaven, Buckhead, Chamblee, Doraville, Dunwoody, Grant Park, Inman Park, Johns Creek, Duluth, Milton, Roswell, and most major suburbs.

By

Primers are important to professional painting companies, interior painters, exterior painting.

What is the Purpose of Primers?

If you have ever been into a paint store you probably heard something about primers.  Whether you were asking about how to paint something or reading informational pamphlets, you learned that primers are important.  When talking to clients, I realize that “normal” people don’t know the exact definition of primers.  This article will help correct that.

What does a primer do?

Prepares a substrate to accept a top coat.

This is a short but vague answer.  A better answer is extrapolated when another question is asked.

What do you need the primer to do?

Answering this question will better define for what primers are used.  There are many different types of primers, each having a different purpose.  Here are some common applications for primers.

  • Promoting adhesion – This is important when painting hard, glossy surfaces like glass, plastic, metal, or porcelain.  If you painted directly on these surfaces, the paint would scrape off.  Bonding primers make these surfaces paintable.
  • Sealing stains – Painting over water, smoke or oil stains requires priming to prevent the stains from bleeding through the paint.
  • Sealing wood – In order to prevent tannin and knots to bleed through paint, you must prime raw wood.
  • Changing colors – When making drastic color changes, priming can save a coat or two of paint.
  • Smoothing substrates – Extremely rough and porous surfaces, like cinder blocks, are primed with a very thick coating so that the paint has an even surface.
  • Equalizing porosity – Primers are used to create a uniform porosity so that paints will have a uniform finish.  An example of this new drywall.  The drywall, tape, and finishing compound all have different porosity and require  priming if using a non-flat paint.
  • Preventing/Re-mediating rust  – There are primers that prevent rust on ferrous metals and others that reform rust into an inert metal.
  • Industrial applications – There are numerous specialty primers used for industrial painting applications.  These uses are too specific and technical for the purposes of this article.  If you have questions using these primers, you need to read the manufacturer specifications.

This concludes primers 101.  If you have more questions, email us using our contact form.

By

President of GreenWave Solutions, Atlanta’s painting company and house painters.  GreenWave Solutions offers the best painter services in Alpharetta, Atlanta, Dunwoody, Sandy Springs, Roswell, Brookhaven, Duluth, Grant Park, Inman Park, Buckhead, Midtown, and many more!  We offer house painting in Johns Creek.

We are the best painters in Atlanta.

Interior and exterior Brookhaven painters and professional painting company.

How to Paint a Bathroom

This “How To” article is easier than wallpaper removal or popcorn removal.  We are going to learn how to paint a bathroom.  When painting a bathroom, the most important decision is what type of paint to use.

Bathrooms are unique rooms because they are high traffic and wet conditions.  The paint in bathrooms must be durable enough to withstand the traffic, but also water-resistant to stand up against steam from showers.  The simplest measure of determining durability of interior paints is sheen.  The higher the sheen, the more durable the coating.

In the old days, satin was the “go to” finish for baths.  Satin has lower sheen than semi-gloss but is more durable than flats.  With the advance in coating technologies, manufacturers have developed “washable flats” and matte finishes.  Washable flats and matte finishes have an angular sheen closer to a flat with durability that surpasses semi-gloss.  These finishes are typically reserved for premium quality lines of paint.  All major manufacturers have this finish as part of their product line.

Matte finish paints apply the same way as other those with other sheens.  Due to the high quality nature of these paints, they usually apply better than other paints.  Many have exceptional hide and are self priming.  GreenWave Solutions uses Sherwin Williams’ premium lines Duration Home and Emerald.

After you have chosen which paint you are going to use, it’s time to start painting.

To see how professional contractors do interior painting, see our “How to paint a room” article.

The easiest way to paint a bathroom or any other room is to hire a house painting contractor.  GreenWave Solutions has been Metro Atlanta’s premier painting company for over 8 years.  We specialize in interior painting, exterior painting, and all other residential and commercial painting.  Our goal for 2012 is to be the best painters in Alpharetta.  Our service area isn’t limited to Alpharetta.  We service Roswell, John’s Creek, Milton, Dunwoody, Sandy Springs, Buckhead, Brookhaven, and most major Atlanta suburbs.

Call today to schedule your free estimate.

By: GreenWave Solutions, the best house painters in Alpharetta.

Connect with

Atlanta Wallpaper Removal, Roswell, Alpharetta, Decatur, Sandy Springs, Buckhead, Chamblee

How to Remove Wallpaper

We are going to tackle one of the most tedious and annoying jobs for do-it-yourselfers – wallpaper removal.

Anyone who has removed wallpaper knows that it is a horrible experience.  The scraping is horrible enough, but after it is done, you are left with dirty damaged drywall.  Then you learn that refinishing walls is harder than it looks on HGTV.  After that you get to have fun priming and painting.  I can’t tell you that there is secret to make wallpaper removal easy, but I will tell how professional painters do it.  Here we go.

1. Gather all you materials.  This is list of almost everything you need (there may be other items that I take for granted because I see this all the time.  Please don’t send me hate mail if I forgot something).

  • a steamer
  • scrapers
  • construction paper and plastic
  • painters tape
  • sponges and rags
  • wallpaper removal gel or solution (optional)
  • powder drywall joint compound, “mud” (45 minute)
  • mud pans
  • finishing knives
  • paint brushes
  • rollers, frames, pole
  • sand paper and pole sander
  • dust masks and eye protection
  • alkyd or shellac based primer
  • paint

2. Prepare your work area.  Cover floors with the construction paper.  Try and close off the area using the plastic.  This is for keeping the dust contained.  Remember to close any intake ducts or turn off HVAC.  Take off switch plates, electrical outlet covers, and anything else that’s in way.  This process is annoying, but you will be glad you did it at the end.  It controls dust and makes clean up MUCH easier.  Trust me.

3. Time to start removing the wallpaper.  If you are using wallpaper scorers and gels, follow the manufacturers instructions.  If you have a steamer, start steaming.  I recommend using a scoring tool to make holes in the vinyl layer.  This helps the heat and steam get through the paper for better release.  This can go two ways; either the paper is going to comes off in nice big pieces or small ones.  Pray for the first option.  Use your scraper to get under the paper and GENTLY scrape the paper and adhesive from the wall.  Try your best to avoid gouging holes in the wall.  The more damage you do during the removal, the more difficult refinishing the wall is going to be.  Keep a bucket of warm water and wipe off the wallpaper adhesive while its wet.  This also will facilitate next steps.

4. By now you are ready for a break.  Take a break, eat something, drink a beer and let the walls dry.

5. Refinish the walls.  This can be tricky.  Make sure you mix the drywall compound using the ratio on the bag.  Only mix small amounts at a time.  Using your finishing knives, apply a THIN layer of mud over the areas that have damage or are rough.  The trick here is too use as little finishing compound as necessary to bury imperfections.  Remember the more you put on, the more you are going to have to sand off to achieve a professional finish.  Also, it is much easier to apply a thin 2nd layer coat having to sand down a even a 1/4 inch of excess.  Putting too much joint compound is one of the most common rookie mistakes.  After the mud dries (about 45 min depending on temperature and humidity), sand it down.  I recommend 150-220 grit paper.  Wear a dust mask and even goggles.  It is going to be disgustingly dusty.  That is why we made a barrier with plastic and closed intake vents in step 1.  Drywall dusts really sucks.  I’ve seen projects where people forget to turn on HVAC and the dust gets sucked up and blown through an entire house.  Not cool.

After you have sanded the walls, refinish any areas that need more work.  After everything is dry, take a damp rag or sponge and wipe all of the loose dust from the walls.

6. Take another break.

7. Now that you have smooth, clean walls you are going to prime everything that had wallpaper on it.  I recommend using an alkyd or shellac based primer for this.  Wallpaper adhesive is a water soluble, starch based product.  Using a waterborne primer can sometimes reactivate the glue and cause problems for the paint.  Alkyd and shellac based primers are going to have higher VOCs and typically have bad fumes.  Get fans blowing and open windows because these are bad to breathe.  Use a respirator if you have one.  Keep kids away, too.  They will have plenty of time to damage their brains in college.  The good news is that these products do dry quickly so the fumes dissipate quickly.

8. You’re almost done.  All that’s left is the easy part – painting.  Everything should still be prepared from priming so painting is super easy.  Choose your favorite paint and color and paint.  If you are using a dark color, have the paint store tint your primer so that one coat of paint will cover adequately.

Congratulations!  You have successfully removed and repainted a wallpapered area.  You also learned why so many people opt to call professional painting companies to do this job.  Doing it yourself can save you money, but the hassle and stress may cost you your sanity.

GreenWave Solutions specializes in wallpaper removal.  We remove residential and commercial wall coverings.  Call us to schedule your free estimate today!

GreenWave is also the best interior house painters, exterior house painters, and house painting company and serves Atlanta, Alpharetta, Brookhaven, Buckhead, Chamblee, Doraville, Dunwoody, Grant Park, Inman Park, Johns Creek, Duluth, Milton, Roswell, and most major suburbs.

By: Daniel Macris, President of GreenWave Solutions, the best house painters in Sandy Springs.

Connect with

Ceiling texture removal, Atlanta Painting Company, House Painters, Atlanta, Alpharetta, Sandy Springs, Dunwoody, Brookhaven, Buckhead, Roswell, Marietta, Milton, Decatur

How to Smooth a Popcorn Ceiling

Today’s Article is going to tackle one of the more tedious projects with which homeowners face:  Removing popcorn or stipple texture from a ceiling.

This is not a difficult process. It is, however, extremely messy, labor intensive, and tedious. It also requires good finishing skills for professional results. I am going to make this a step by step explanation.Gather all of your materials and supplies:

1. Gather your materials and supplies.

  • spray bottle with water
  • scrapers
  • plastic and construction paper
  • sand paper and poles
  • trash bags
  • dust masks
  • eye protection
  • paint brushes
  • drywall compound
  • finishing knives
  • paint

2.  Prepare the area.

This is going to be a dusty, messy process so proper preparation is imperative.  Move all the furniture out of the room or into the center of the room.  If the furniture stays in the room, cover it with plastic and tape the plastic.  Cover all floors with plastic or construction paper.  Also, cover A/C intakes or turn of the HVAC altogether.  The drywall dust is so fine it will go into the ventilation and get spread throughout the building.

3. Start removing the texture.

Both stipple and popcorn texture are water based products.  The easiest way to remove them from your ceiling is by spraying them with warm water and letting the water seep into the texture.  After a few minutes, the texture should be soft enough to be scraped off.  How easily the texture comes off depends on many variable and can’t be accurately determined until you start scraping.  Continue removing the texture as described about until it is all gone.  You are done for the day.  Let the ceiling dry and get some rest because your neck and shoulders are probably sore.

4.  Refinish the ceiling.

This takes some skill.  There is no doubt that the ceiling looks like it needs help.  Get your drywall compound and finishing knives ready.  I recommend buying a 5 gallon pail of joint compound or the bag mix so that you can make as much as you need.  Now that you have your finishing tools ready start refinishing the ceiling.  Remember that the less compound you use, the less sanding and dust you will have to deal with in step 5.  After you have finished applying drywall compound on the ceiling, take lunch and give the compound time to dry.  Dry time depends on temperature, humidity, and the type of compound you used.  I recommend 45 minute compound.

5.  Sanding and touch up.

Now comes the really messy part.  Put on your dust mask and eye protection.  Sand the entire ceiling until it is smooth.  If there are areas that don’t look right, touch them up with more compound and re-sand it after it dries.  Once you have the ceiling smooth, dust it with a damp rag or paint brush to get the loose dust off of it before step 6.

6.  Prime and paint.

You’re almost done!  I know that step 6 says, “Prime and paint”, but you may not have to prime.  If you are using flat paint, which I recommend on ceilings, then you can paint directly on the finished ceiling.  If there are water stains, then they do need to be primed using an alkyd or shellac primer/sealer.  After the paint dries, do a walk through and address any areas that need to be touched up.  If everything looks good, then proceed to the last step.

7.  Clean up.

This should be a welcome step by now.  Clean up all of the plastic and paper, put the furniture back and enjoy your nice smooth ceiling.  Hooray!

If you just got through smoothing a textured ceiling you are probably thinking, “I am never going to do that again.  Next time I am going to hire a professional.”

That’s when you call GreenWave Solutions.  We are Metro Atlanta’s best painting company.  We serve Atlanta, Alpharetta, Brookhaven, Buckhead, Chamblee, Cumming, Duluth, Dunwoody, Doraville, Grant Park, Inman Park, Milton, John’s Creek, Sandy Springs and more.  Call us for the best interior painters in Alpharetta!

Simply put, GreenWave Solutions has the best painters in Atlanta.

By: Daniel Macris, President of GreenWave Solutions, the best house painters in Atlanta.

Connect with


Atlanta Residential Interior Painting Gallery

Which Paint Sheen to Choose?

As a painting contractor, I am constantly asked by my clients which paint sheen is best. This is one of those questions that doesn’t have a single, correct answer.  Every sheen has pros and cons associated with it.  For this article I am focusing specifically on interior, residential applications.

Before you can decide what the best sheen is, you must understand environment in which the coating is exposed.

Here are the factors that you must consider when choosing a sheen:

1.  How much wear and tear will the coating be exposed to? Are their pets or children that frequently and/or roughly touch the walls?  Is it a high traffic area like an entry way or mud room?  Will the area be exposed to abnormal conditions like steam, smoke , or grease?  If the walls are going to get a lot of wear and tear or will require cleaning, you will need something with a sheen.  Paints with sheen are more durable and washable.  Some manufacturers have “washable flats.”  These coats have outstanding durability with a very slight sheen.  Most of them are as good as advertised.  They are, however, expensive.

2.  In what condition are the walls? Do the walls have bad repair work done?  Are there nail pops?  Is the drywall hung and finished poorly?  If you answered yes to any of these, you should opt for a flatter sheen paint.  The flatter the sheen, the fewer imperfection you will see.  This is because light bounces off of imperfections at odd angles and if you have a sheen, you will see a glare at the imperfection.

How dark is the color? Darker colors tend to be unforgiving when showing lap marks and surface imperfections.  Paints with higher sheen have these same limitations.  That is why I don’t recommend using higher sheen paints for dark colors.  (I am referring to walls with this statement.  In some applications, this is not true).  This isn’t a rule, but my expert recommendation is “the darker the color, the flatter the sheen.”


Well that’s about it.  I’m sure we can think of other factors that can influence paint sheen, but the three above cover 95% of all interior, residential projects.


To sum up

Flatter sheen paints:

Pros – Better at hiding imperfections, touching up, give walls a softer, smoother look.

Cons – Mar and scuff easily,  not washable, tend to fade faster

Higher sheen paints:

Pros – Durable, washable, holds sheen and color

Cons – Show imperfections, laps marks, and glare


By Daniel Macris

Daniel Macris is the president of GreenWave Solutions, Inc. in Atlanta, GA.  GreenWave Solutions is the premier painter in Atlanta.  We are the first “Green” contractor in Atlanta.

Connect with